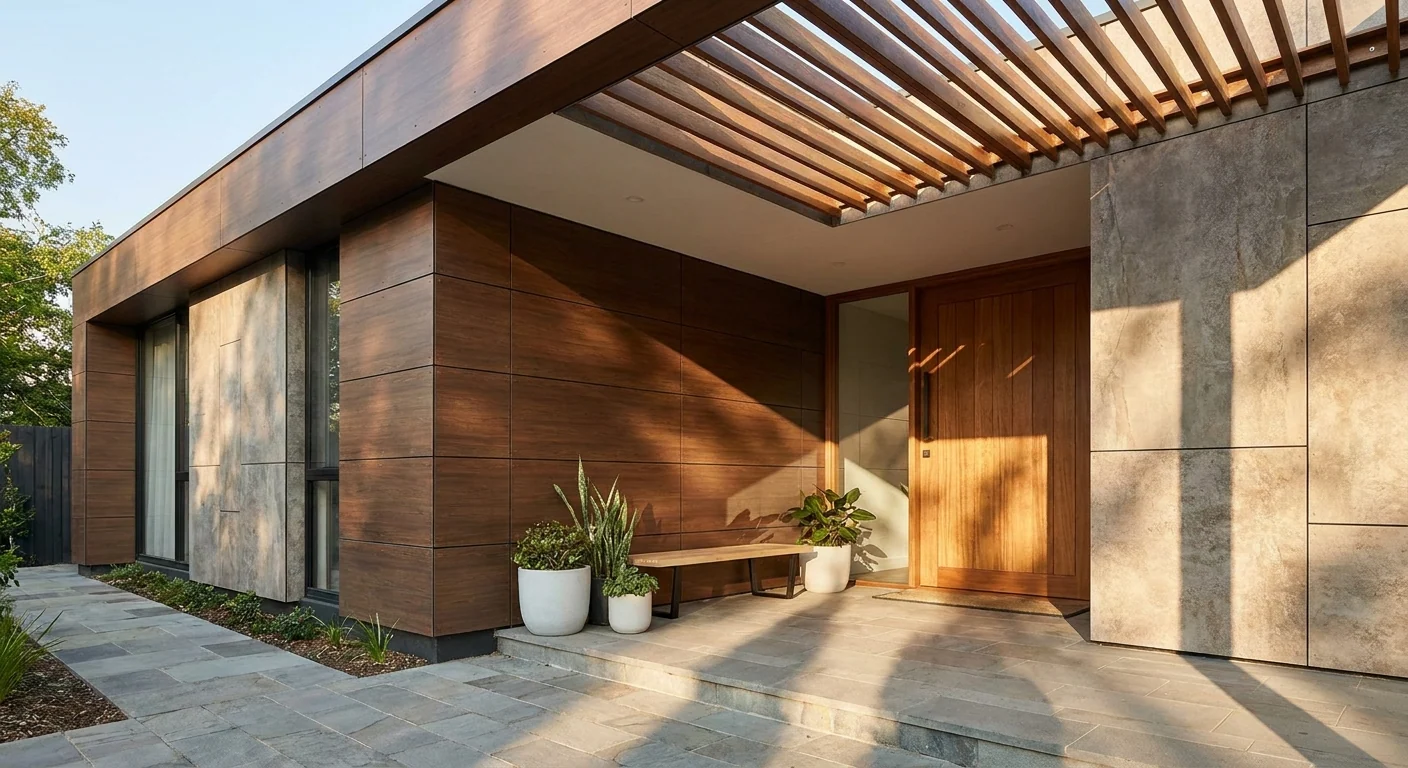
Garden walls in the UK take a battering most indoor surfaces never see: frost-thaw cycles, driving rain, and months of damp that never fully dries out between storms. Picking cladding without checking how it handles that cycle is the single biggest reason boards cup, fixings rust, and panels need replacing inside two winters.
Match the cladding material to your wall’s exposure first, then sort fixings and ventilation before you think about finish. Akuwood Panel’s exterior wall cladding panels are built as a weatherproof option for garden walls, fences, and outbuildings, and they sit alongside timber and composite boards as one of the routes worth comparing before you order anything. The verdict: pick a material rated for constant damp exposure, leave a ventilation gap behind every board, and budget time for a proper fixing check each autumn.
This guide walks through the decisions that actually determine whether garden wall cladding survives a UK winter — wall assessment, material choice, fixing systems, ventilation, finishing, and ongoing maintenance. None of it is complicated, but skipping a step is exactly how homeowners end up re-cladding the same wall in 2028 instead of 2036.
What you’ll need
- Tape measure and a note of the wall’s height, length, and orientation (north-facing walls hold damp longest)
- Cladding boards or panels — garden wall cladding is the category to start comparing
- Treated timber battens for the support frame
- Stainless steel or coated exterior fixings (not standard zinc screws)
- A spirit level and chalk line
- Exterior-grade sealant for cut edges and joins
- A saw rated for the board material (timber or composite blade, depending on what you choose)
Step 1: Assess your wall’s exposure and moisture risk
Walk the wall at different times of day and note which sections stay damp longest after rain. This tells you where moisture risk is highest before you spend a penny on materials.
South and west-facing walls dry out faster between weather events; north and east-facing walls, and anything shaded by fencing or trees, hold damp for days. That difference matters because it changes which cladding material makes sense for which section of wall.
Check the base of the wall too. Any section within 150mm of soil or paving needs extra protection against splash-back, since that’s where rot and mould start first on timber cladding.
A common mistake here is treating the whole wall as one zone. A garden wall that runs along a boundary often has a sunny street-facing side and a shaded garden-facing side — they don’t need identical treatment.
Step 2: Choose a weatherproof cladding material
This is the decision that determines whether the job lasts one winter or fifteen. The two broad routes are natural timber cladding and composite or manufactured wood-panel cladding, and each behaves differently once the weather turns.
Natural timber cladding looks the part and ages well visually, but it needs regular treatment to stay weatherproof — untreated or under-treated timber will absorb moisture, swell, and eventually cup or split when it dries out unevenly. Composite and manufactured exterior panels are built specifically to resist that cycle, which is why they’re increasingly the default choice for garden walls that don’t get checked every month.
Akuwood Panel’s exterior cladding panels fall into this second category: wall cladding designed to handle outdoor exposure rather than timber that needs ongoing upkeep to stay weatherproof. For a garden wall — as opposed to a house facade you can inspect from inside — that lower-maintenance profile matters, because nobody is popping out every fortnight to check a boundary wall.
Whatever you choose, check how the manufacturer describes its exterior performance rather than assuming all cladding behaves the same. Exterior cladding panels for garden walls is worth reading before you commit, and so is a straight timber vs composite vs render comparison if you’re still deciding between material families.
The mistake to avoid: picking a finish purely on colour and assuming all boards in that colour range perform the same outdoors. Two products can look identical in a showroom and behave completely differently after a wet winter.
Step 3: Select the right fixing system for your wall type
The cladding is only as good as what’s holding it to the wall. Brick, block, render, and timber-frame walls all need different fixing approaches, and using the wrong one is how boards come loose within a year or two.
For masonry walls, you’re typically fixing battens into brick or block with masonry screws and wall plugs rated for exterior use, then fixing the cladding to the battens. For timber-frame structures, you’re fixing straight into the frame studs where possible, which needs accurate stud-finding before you start drilling.
Stainless steel or coated fixings are the baseline for anything outdoors — standard zinc-plated screws corrode within a season or two of UK rain and will streak the cladding with rust stains as they go.How to choose cladding fixings for different wall types covers the fixing-to-wall-type matrix in more depth.
Expected outcome: a batten frame that’s level, secure, and ready to take the cladding boards without any flex when pushed.
Step 4: Build in a ventilation gap behind the boards
Cladding fixed flush against a solid wall traps moisture between the board and the masonry, which is exactly the setup that causes rot, mould, and frost damage over a UK winter.
A ventilation gap — created by the batten frame itself — lets air move behind the cladding and lets any trapped moisture dry out instead of sitting against the wall. This single detail is the difference between cladding that lasts a decade and cladding that fails from the back where you can’t see it.
Leave the gap open at top and bottom (or use vented trims) so air can actually circulate rather than being sealed into a dead pocket. A sealed-in gap with no airflow is worse than no gap at all, because it holds damp air against the wall permanently.
Step 5: Finish and seal exposed edges and tops
Any cut edge, top cap, or join is where water gets in first. Seal cut ends with an exterior-grade sealant appropriate to the material, and cap the top of the cladding run so rain doesn’t run straight down into the board ends.
A wall-top cap or capping detail sheds water away from the cladding face entirely rather than letting it drip down the front.Best exterior cladding for a UK garden wall top cap walks through capping options if your wall doesn’t already have coping stones or a built-in overhang.
The common mistake: finishing the visible face beautifully and leaving cut ends at corners or around gates completely unsealed. That’s almost always the first place winter damage shows up.
Step 6: Plan a seasonal maintenance routine
Even low-maintenance cladding benefits from a once-a-year check, ideally in autumn before the worst of the winter weather arrives. Walk the wall, check fixings haven’t worked loose, and look for any boards that have started to lift at the edges.
How to maintain exterior wall cladding panels andhow to clean outdoor wood cladding panels both cover what an annual check should include, from clearing debris out of ventilation gaps to spotting early signs of moss build-up at the base.
Skipping this step is the most common reason cladding that was installed correctly still fails early — a loose fixing caught in October is a five-minute fix; the same fixing ignored until February is a board replacement.
Common mistakes with garden wall cladding
- Boards cupping or warping — usually a sign the material wasn’t rated for constant outdoor damp, or there’s no ventilation gap behind it.
- Rust streaks down the face — almost always standard fixings instead of stainless steel or coated exterior screws.
- Mould or green staining at the base — check for splash-back from nearby soil or paving and whether the bottom edge is sealed.
- Gaps opening between boards in winter — natural expansion and contraction; leave manufacturer-recommended expansion gaps at installation rather than fitting boards edge-to-edge.
- Discolouration on sun-facing sections only — UV exposure fades some finishes faster than others; check how a product is rated for sun exposure, not just rain, before fitting a south-facing wall.
Tools and materials used
- Cladding boards — Akuwood Panel’s exterior wall cladding panels, or an equivalent weatherproof-rated composite board
- Treated battens — for the ventilated support frame
- Stainless steel fixings — rated for exterior use, not standard zinc screws
- Exterior sealant — for cut edges, joins, and corners
- Spirit level and chalk line — for a straight, level batten run before any board goes up
FAQ
Does garden wall cladding need planning permission in the UK?
Most garden wall cladding on an existing boundary wall doesn’t need planning permission, but height, listed-building status, and conservation area rules can change that. Check with your local planning authority before cladding a wall over 2 metres or anything near a shared boundary.
Can Akuwood Panel’s exterior cladding go directly onto a rendered wall?
Exterior cladding panels are typically fixed to a batten frame rather than straight onto render, which creates the ventilation gap render walls need to avoid trapping damp behind the boards.How to combine exterior cladding with render on one facade covers the batten approach for mixed-finish walls.
Is composite cladding better than timber for a UK garden wall?
Composite and manufactured panels generally need less ongoing treatment than natural timber, which matters for a garden wall nobody inspects weekly. Timber can look better long-term if you’re committed to regular treatment; composite is the lower-maintenance route if you’re not.
How often should garden wall cladding be checked in winter?
An autumn check before the wet season and a quick look after any major storm covers most of the risk. Fixings and ventilation gaps are the two things worth checking most often.
What’s the biggest cause of cladding failure on garden walls?
Trapped moisture, almost always from a missing ventilation gap or an unsealed cut edge, is the most common cause of boards rotting or warping from behind rather than the visible face.
Do Akuwood Panel’s exterior panels come in different finishes for garden use?
Exterior cladding panels are part of Akuwood Panel’s outdoor range alongside hexagon and decorative panel options — check the current range on the site for what’s available for a garden wall project.
Conclusion
Garden wall cladding that survives a UK winter comes down to five decisions done in order: assess exposure, choose a material rated for constant damp, fix it correctly for your wall type, leave a ventilation gap, and seal every cut edge. Skip any one of those and you’re looking at a repair job within a couple of winters rather than a wall that holds up through 2026 and well beyond.
Akuwood Panel’s exterior wall cladding panels are one route worth comparing for garden walls, fences, and boundary cladding projects where low maintenance matters more than weekly upkeep. Whatever material you land on, the ventilation gap and the fixing choice matter more than the finish — get those right and the rest of the job holds.